In the series Typesetting TeXniques, we share our expertise as professional copyeditors and typesetters of mathematics. We frequently hear from authors that our work makes their papers better. This is how we do it.
There are a variety of tools specifically designed for typesetting commutative diagrams,
some with better results than others, some more versatile than others, and some with steeper learning
curves than others. Tools not specifically designed for this purpose
produce at best adequately typeset commutative diagrams.
For example, this diagram was typeset using the {array} environment:
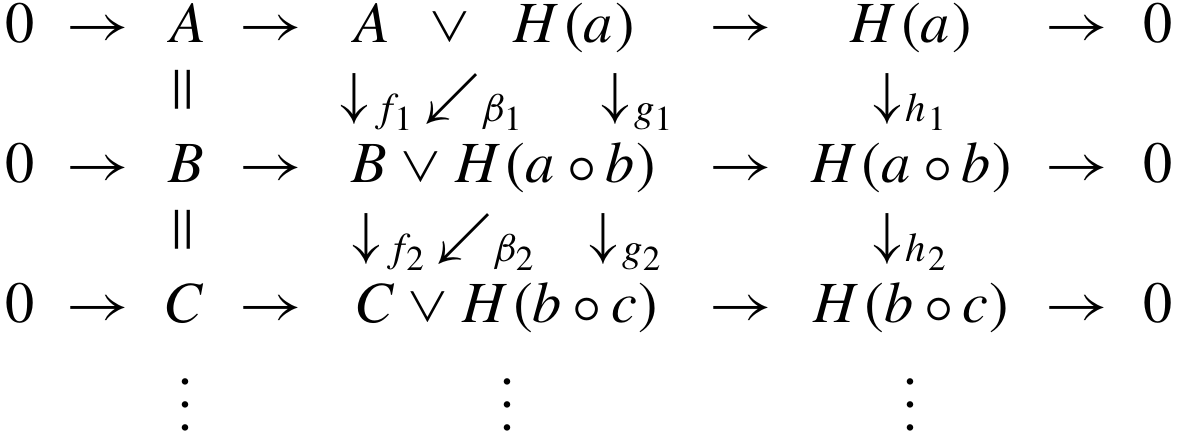
Notice the big gaps between arrows and entries and the inconsistent spacing around
\vee. In the middle column, the arrows aren’t aligned with the entries, and the labels on the diagonal arrows are closer to the row below them than to the arrows they’re labeling.
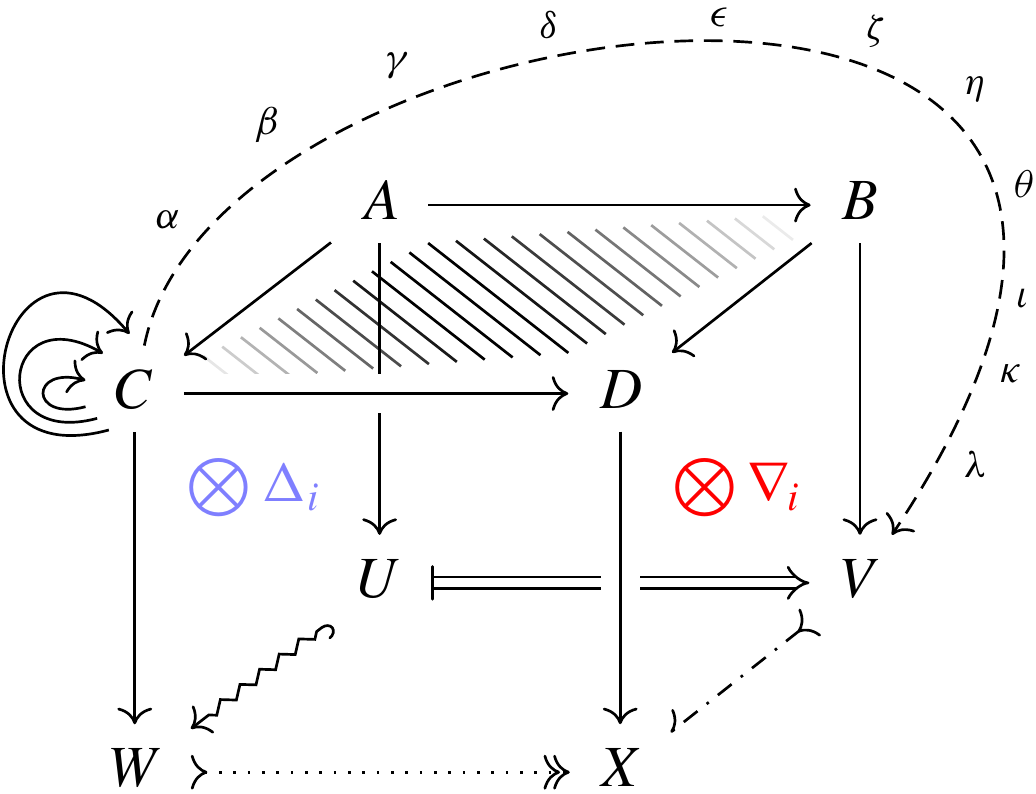
There is a versatile tool for typesetting commutative diagrams that provides professional results and is easy to start using: the tikz-cd package. Creating basic diagrams with tikz-cd requires only a few simple commands, and if you want more complicated diagrams, it offers a huge amount of flexibility. The many available options can be combined to typeset virtually any diagram, no matter how strange:
Let’s get started with tikz-cd by writing the code for this simple diagram:

The {tikzcd} environment uses the same structure as {array}, with entries separated by ampersands and rows separated by double backslashes:
\begin{tikzcd}
A & B
\\
C & D
\end{tikzcd}
To get an arrow, insert the \ar command inside the entry where the arrow begins
and specify, in brackets, the direction of the arrow. Directions are denoted by u, d, l, and r (up, down, left, and right), and these can be combined. For example,
\ar[uurrr]
will try to make an arrow pointing two rows up and three columns to the right.
To give an arrow a label, add it as an argument marked off by quotation marks. For example,
\ar[r,"f"]
will produce a right arrow with the label f.
We now have the tools to write the code for our simple diagram:
\begin{tikzcd}
A \ar[r,"f"] \ar[d,"s"] & B \ar[d,"t"]
\\
C \ar[r,"g"] & D
\end{tikzcd}
The \ar command takes other options, all given within one pair of square brackets and separated by commas. The only required option is the direction of the arrow.
Professionally typesetting the diagram shown at the beginning of this post
requires using some additional options of the \ar command.
Watch the video below for a demonstration of these,
along with some other options of the tikz-cd package.
Watch the video #
Further reading #
The documentation for tikz-cd is here.
Header image by Jens Lelie, available from Unsplash. Free to use under the Unsplash license.